How to Pour Concrete: A Step-by-Step Guide
Pouring concrete is a foundational skill in construction projects, whether for sidewalks, patios, driveways, or foundations. Achieving a smooth, durable, and level concrete surface requires careful planning and execution. In this guide, we will break down the steps involved in pouring concrete—from prepping the site to finishing the concrete.
Step 1: Plan and Prepare the Site
Why it’s important: Proper preparation ensures the concrete has a solid, stable base to prevent cracking and settling over time.
- Clear the area: Remove any debris, grass, plants, rocks, or old concrete. This allows the new concrete to have a uniform surface to bond to.
- Check for proper drainage: Ensure the area slopes slightly away from structures or other obstructions to prevent water pooling.
- Excavate: Use a shovel or excavator to dig down to the desired depth, based on the type of project you’re working on (e.g., a driveway requires a deeper base than a patio).
- Create a form: Use wooden or metal boards to create the mold for the concrete. The form should be level, square, and tightly secured to avoid shifting when the concrete is poured.
Step 2: Add Gravel or Base Material
Why it’s important: A gravel or base layer acts as a solid foundation, preventing the concrete from shifting or cracking due to changes in the ground underneath.
- Spread a layer of gravel (or crushed stone) evenly across the base. Typically, 3-4 inches of gravel is adequate. This layer helps with drainage and provides a stable, uniform surface for the concrete to rest on.
- Compact the gravel: Use a plate compactor to pack the gravel tightly. This ensures the base is firm and stable, reducing the risk of future settlement.
Step 3: Install Reinforcement (Rebar or Wire Mesh)
Why it’s important: Reinforcement prevents cracking and improves the overall strength of the concrete slab.
- Place rebar or wire mesh within the form, ensuring it is raised slightly off the gravel base (using small concrete supports or “chairs”). This allows the reinforcement to stay within the middle of the concrete once it’s poured, where it is most effective at providing tensile strength.
- Tie the rebar with wire to ensure the bars are securely positioned and won’t shift during the pour.
Step 4: Mix the Concrete
Why it’s important: The right consistency of the concrete mix ensures durability and ease of pouring.
- Choose the correct mix: For most general-purpose applications, a standard mix of 1 part cement, 2 parts sand, and 3 parts gravel works well. Alternatively, you can purchase pre-mixed bags of concrete.
- Mix the concrete: If mixing by hand, combine the dry ingredients and slowly add water until the mix reaches a thick, workable consistency (it should hold its shape but be wet enough to spread). For larger jobs, a concrete mixer is often used to ensure consistency.
Step 5: Pour the Concrete
Why it’s important: Pouring concrete evenly and without delay is essential for creating a smooth, consistent surface.
- Start pouring: Begin at one end of the form, pouring the concrete evenly across the area. Avoid pouring too much at once—work in small sections to keep the concrete manageable.
- Work quickly: Concrete sets fast, so it’s important to keep up a steady pace to prevent the mix from hardening before you can spread and smooth it.
Step 6: Level and Spread the Concrete
Why it’s important: Proper leveling ensures that the surface is flat and even, which prevents water pooling and provides a smooth finish.
- Use a screed board: After pouring, use a long, straight 2×4 or screed board to level the concrete. Move the board back and forth in a sawing motion, pulling the excess concrete toward you and filling in low spots.
- Level the surface: Continue working the concrete to maintain an even level across the slab. You may need to add more concrete to low spots as you go.
Step 7: Smooth and Finish the Surface
Why it’s important: Smoothing the surface is crucial for both aesthetic appearance and safety. A properly finished concrete surface is less likely to crack and is easier to walk or drive on.
- Float the concrete: Use a bull float (a large, flat tool) to smooth the surface. This will help eliminate imperfections and push any excess water to the surface.
- Trowel the edges: Once the concrete has begun to set (you’ll know it’s ready when it’s firm but still moist), use a hand trowel to smooth the edges and corners of the form.
- Create texture (optional): If you want a textured surface (e.g., for non-slip purposes), use a broom or other finishing tool to create the desired pattern. Broom finishes are common for driveways and walkways to enhance traction.
Step 8: Let the Concrete Set
Why it’s important: Allowing the concrete to set properly will prevent cracks and ensure the mix has fully hardened before any weight is applied.
- Let it cure: After finishing, allow the concrete to cure for at least 24 to 48 hours before walking on it, and up to 7 days for heavier applications like vehicles or structures. During this time, it’s important to keep the surface moist to prevent rapid drying, which can cause cracking.
- Curing: For the best results, cover the slab with plastic sheeting or damp burlap to retain moisture and prevent the surface from drying out too quickly. Curing for a week is generally recommended for maximum strength.
Step 9: Remove the Forms
Why it’s important: Removing the forms once the concrete has sufficiently set ensures the slab is fully formed and ready for use.
- Take out the forms carefully after about 24-48 hours (or as recommended depending on weather conditions). Be gentle to avoid damaging the edges of the concrete.
- Clean up: Once the forms are removed, clean up the site, removing any leftover concrete, debris, or tools.
Step 10: Final Curing and Sealing
Why it’s important: Ensuring the concrete continues to cure and applying a sealant helps prevent cracks, stains, and damage from environmental elements.
- Continue curing: If you haven’t already, continue to cure the concrete for up to 7 days by keeping it moist.
- Seal the surface (optional but recommended): Once the concrete has fully cured, consider applying a concrete sealant to protect the surface from moisture, stains, and wear.
Conclusion
Pouring concrete may seem like a straightforward task, but it requires careful attention to detail at each step. From preparing the site to properly finishing the surface, every action impacts the durability, strength, and appearance of the final product. With the right preparation, materials, and timing, your concrete project will be built to last for years to come.


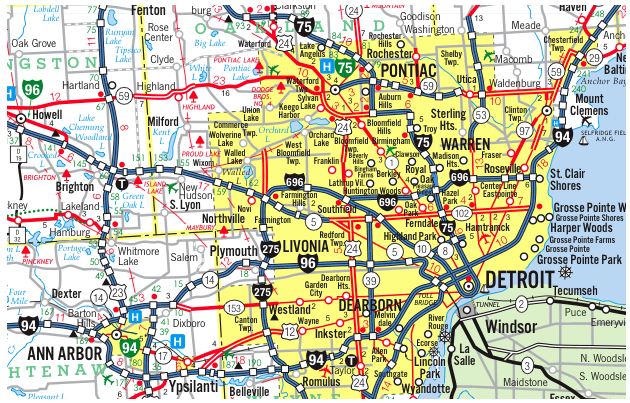
 Our Construction company is Servicing Southeast Michigan, Detroit and the Tri-County area Wyane, Oakland and Macomb;
